This review is based on long-term use of the Jöttnar "Grim" hard shell jacket which was purchased in January 2021 and has been extensively and regularly used for walking, backpacking and ski touring since purchase.
Jöttnar aren't perhaps the best known outdoor brand, but have increasing visibility among mountain users, and for good reason. The brand name sounds Nordic but Jöttnar are a small British company based in Cardiff. The company was formed in 2013 by Steve Howarth and Tommy Kelly, two former Royal Marine Commandos who served in the Mountain Leader branch, a specialist group within the Royal Marines trained for mountain, arctic and harsh environment operations. For more about the company's story, there's a very informative article and short video on the Jöttnar website.
The company philosophy and "house style" seems very much a reflection of the founders' background and of the Commando ethos - the kit they produce is streamlined, tough, designed-for-purpose, innovative and has fantastic attention to detail. I heard of Jöttnar through word-of-mouth, was shown some of their kit by a friend and was veryy impressed by what I saw.
Conflict of Interest statement: I own several items of Jöttnar clothing, all of which have been purchased at full retail price or in a limited time sale with a small reduction. I don't have any connection with the company other than being a very satisfied customer.
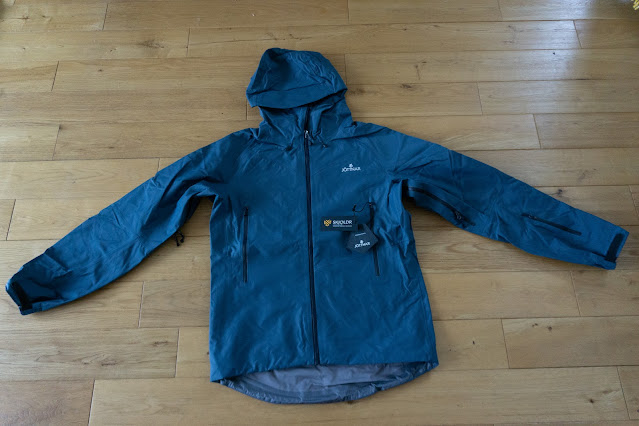
Jöttnar describe the Grim as: "a fully featured hard shell technical mountain jacket. Grim protects you in the most severe conditions, without sacrificing those features which lend it versatility for all-year use". I was looking to replace a very well-used mountain jacket which had started to delaminate and fail after several years of hard use and the Grim seemed to be a good option.
You won't find Jöttnar products in outdoor stores, the company sells directly to customers via their website. While this does mean that you can't try on garments, the customer advice is very responsive and helpful, and there's free standard shipping on all UK orders.

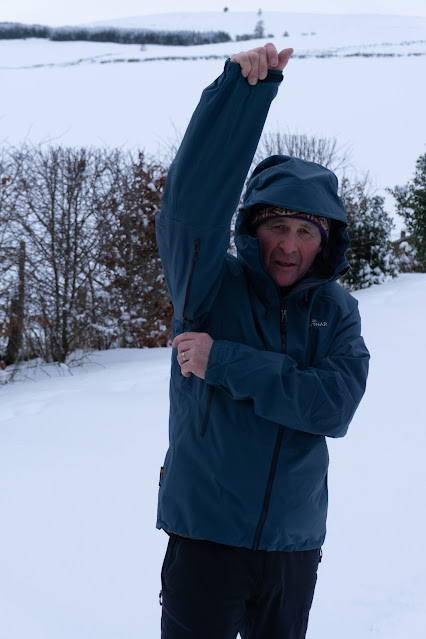
In use, the Grim has been a revelation. Noticeably more windproof than Goretex XCR, ProShell or the eVent fabric used in kit I've recently owned, it just shrugs off weather. The main zip has a substantial storm flap behind it (with a very well designed chin guard). this is a feature I've always looked for in mountain jackets - 3000ft up on a Scottish hill, head down into lashing rain and half a gale is no place to be exploring the difference between "water resistant" and "waterproof"!
The pockets are positioned really well so that they don't get obstructed by rucsac hip belts or climbing harnesses. The Grim jacket has a near-twin in the range which is the Odin which is essentially the same jacket but with chest pockets. There's also the Hodr jacket with four pockets. The Grim's pockets are large and the zips run faultlessly. On one walk of several hours in truly biblical rain there was slight water ingress to the pockets, but absolutely nothing came in via the main zip.
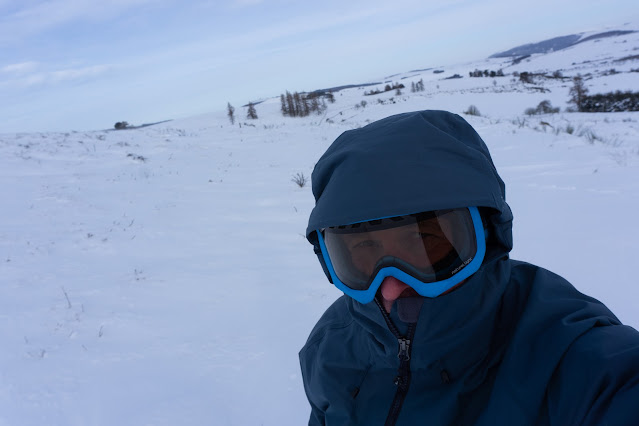
The hood is helmet compatible but adjustable to cinch it down. It moves with the head faultlessly and has a very well designed stiffened and mouldable laminated peak. This image was taken on a ski tour in very cold conditions when it really showed how protective a hood can be.
Photo: Linda Johnston - taken in -15 Celsius weather, hence my expression!
There are pit zips under the arms to vent the jacket if required. I've found that the breathability of the Skjoldr fabric is so good that I've very rarely got warm enough to think about using these, but they're available if needed and very easy to operate on the move. Jacket length is perfect for me, fairly short at the front but with a scoop back to protect the bum. There are hem drawcords which are snag free (i.e. not loops which could catch on gear or rocks).
A small zipped pocket is positioned on the left forearm. This would conveniently fit a ski pass and I've used it to stow a wipe for goggles and a small laminated card with route notes.
The sleeve lengths have extra built in so that the wrist isn't exposed when reaching up (climbing/scrambling) or forward (nordic ski touring). When I was looking at the jacket I did think that the measurements given would make the sleeves too long for me at slightly below average height, but this isn't the case at all in practice because of the design and the cuffs themselves. these have reinforced Hypalon tabs and velcro closures at the front, and a lightly elasticated cinch underneath. this means that the cuffs can be pulled over gloves without faffing with the velcro (which on previous jackets has had a tendency to freeze and be difficult to fasten in wet/just below zero conditions). It's another feature of the Grim which just works.
The fit is streamlined, clean and uncluttered, but with plenty of space to layer underneath. I'm 5ft 8ins (173cms) tall and 41in (104cm) chest and the Medium size is a perfect fit. There's plenty of room in the shoulders to aid movement like placing axes, long reaches with walking poles or whilst ski touring.
What I can't easily show on these images is the design and cut of the jacket, which is exceptionally good and a reflection of the attention to detail and ethos of the company's founders. Everything is there for a reason, and if it's there it adds to the jacket and is incorporated really well.
My initial impression was that this would be a jacket I would use mainly in winter but the performance has been such that I used it right through the year on the hill in "Scottish summer" weather. I have to really be working hard to generate even the slightest moisture inside the jacket and this soon dissipates - the Skjoldr is very, very impressive stuff and seems to this user to out-perform anything I've previously used.
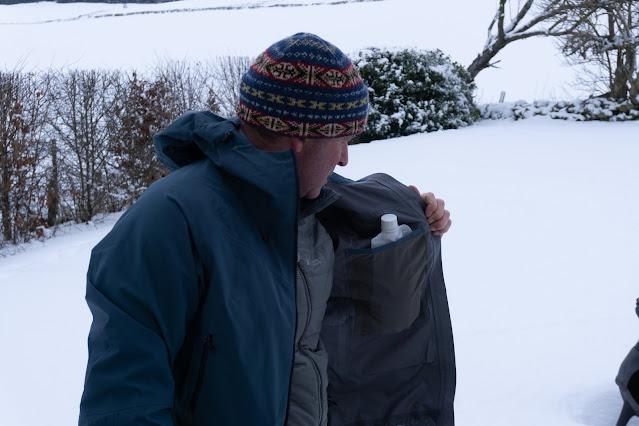
Inside there's a smaller stretch chest pocket which just about takes a smartphone and a larger internat mesh "dump pocket". This fits a pair of gloves nicely, would accommodate touring ski skins and is a great size to keep a 500ml water bottle in. The internal taping is absolutely flawless and here too the design effort is really evident.
The hood is helmet compatible but adjustable to cinch it down. It moves with the head faultlessly and has a very well designed stiffened and mouldable laminated peak. This image was taken on a ski tour in very cold conditions when it really showed how protective a hood can be.
The one minor criticism I have of the Grim is that the hood can't be stowed or retained when not in use. This means it can blow up against the back of the head if not being actually worn. A flap or retaining arrangement would be the only thing I'd change about the jacket - it's a very small criticism though!
The Grim weighs in just over 550grams for a Medium size - not ultralight and that's a good thing as far as this user is concerned. But neither is it heavy and the jacket rolls down neatly when not being worn.
Jöttnar jackets are all single colourways, most of which are understated (though there are some brighter options available). I like the understated colours! A women's version of Grim is also available.
After 15 months of very regular use in Scottish conditions hillwalking, backpacking and ski touring as well as general walking the Grim still looks like new, the DWR has remained effective and it has performed faultlessly. Conditions of use have ranged from 20 degrees Celsius to minus 20 degrees Celsius and have included dry gales, wet gales, rain, sleet, hail, snow, ice, drizzle and freezing fog. In all these conditions I've remained dry and comfortable when wearing the Grim. The term "bombproof" is a little over-used, but is genuinely applicable here. Add in superb design, form and function and you get an outstanding piece of outdoor kit. Put simply, this is the best waterproof jacket I've ever owned - in 40 years of outdoor activities.
There's no getting away from the fact that Jöttnar products are high performance kit designed for sustained usage - and the £449 price is reflective of that. The price was certainly a factor when I chose the Grim and it required delaying the purchase in order to save up, but I haven't regretted the outlay one little bit.